Step 3 - Soil Preparation: A Step-by-Step Guide
Soil preparation is one of the most important steps to having a successful vegetable garden. The best garden soil is fertile, well drained yet retains moisture, and gets enough air circulation which is needed for healthy roots.
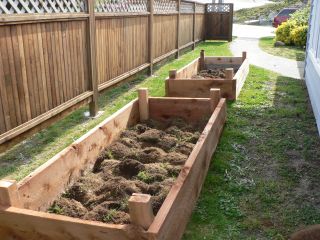
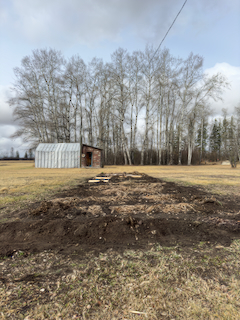 Preparing my soil in the spring
Step 1: Test Your Soil
Before you start preparing your soil, it's important to know its current condition. You can do this by conducting a soil test. Soil tests are available at most garden centers or through your local agricultural extension office.
The test will provide you with information on the pH level of your soil as well as its nutrient content. This information will help you determine what amendments your soil may need.
Step 2: Clear the Area
Begin by clearing the area where you plan to create your vegetable garden. Remove any weeds, rocks, or debris from the soil. If it is a lawn or grassy area, remove any grass.
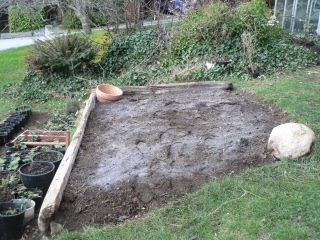
This will provide a clean slate for planting and prevent competition for nutrients with your vegetable plants. In my Mom's old garden site that I am rejuvenating was so weedy I decided to do a Lasagna garden as a first step.
Step 3: Till the Soil
Tilling the soil is an important step in preparing your garden bed. Use a garden tiller or a shovel to loosen the soil to a depth of at least 6-8 inches. This will help improve drainage, aeration, and root penetration for your vegetable plants.
Make sure the soil is ready to work, if it is too wet or too dry you will harm the soil structure and lead to compaction. To test the soil take a handful and squeeze it. If it stays in a ball it is too wet. If is is powdery or has hard clumps it is too dry. If it crumbles freely it is just right. Another sign is if you are turning the soil with a spade and the soil sticks to the end of the tool it is too wet to work. If the soil is too wet wait a week and do your test again.
Step 4: Amend for Soil Preparation
Based on the results of your soil test, you may need to amend your soil with organic matter or fertilizers. Adding compost, aged manure, or other organic materials will help improve the soil structure and provide essential nutrients for your plants. Mix the amendments into the soil thoroughly to ensure even distribution.
Apply manure or compost and soil amendments.
Add well rotted manure or
compost
and dig this into the top few inches of soil with a hand cultivator or rake.for the Roots area - add 1/2 - 1 inch
for the Brassicas area - add 2 inches
for Everything else - add 2-3 inches. Learn more about the above groups at
vegetable garden layout.
From your soil test find out if your soil needs any of the
basic nutrients
and add accordingly.
Add in lime.
Only lime the area where you will be planting your brassica group. If you have really acidic soil (pH below 5.5) you can lime the "everything else" group as well but do not lime the "root" group area. It is best to lime 1 month after you have added manure or compost to your garden soil. Use 6 lbs per 100 sq feet if clayey soil, 4 lbs per 100 sq feet if loamy soil, 2 lbs per 100 sq feet if sandy soil.
Step 5: Level and Smooth the Soil
After amending the soil, use a rake to level and smooth the surface of the garden bed. Break down any large clumps that may be left after you rototill. Pick out any large debris or small stones. You want the soil to be the consistency of coarse breadcrumbs, especially if your are planting vegetables with fine seeds. This will create a uniform surface for planting and make it easier to water and maintain your garden.
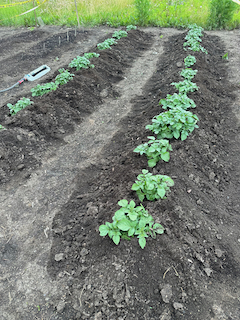 Making designated walking paths is a good thing
Step 6: Create Planting Rows or Beds
Depending on the layout of your garden, you can create planting rows or raised beds. Planting rows are suitable for larger gardens, while raised beds are ideal for smaller spaces and can help improve drainage and soil quality.
Step 7: Mulch the Soil
Applying a layer of mulch to the soil surface will help retain moisture, suppress weeds, and regulate soil temperature. Organic mulches such as straw, shredded leaves, or grass clippings are excellent choices for vegetable gardens.
By following these steps for soil preparation, you will create an ideal growing environment for your vegetable garden. Healthy soil will support strong plant growth, increase yields, and reduce the need for chemical fertilizers and pesticides. With proper care and maintenance, your vegetable garden will provide
Learn more about soil types, soil testing and soil amendments:
Find more information on what are your soil types.
Early spring is the time to start preparing your soil. Starting with soil testing will tell you how much nitrogen, phosphorus, potassium you have in your soil and what the pH (a measure of acidity and alkalinity) is.
From these results you can tell what soil amendments are needed for the best plant growth.
Once your soil preparation is complete your next step in planting a vegetable garden is selecting and planting your vegetable seed.
Return from Step 3 - Soil Preparation to Planting a Vegetable Garden
Recent Articles
-
Vegetable Gardening Frustrations: Lessons for a Better Harvest
Oct 29, 24 07:37 PM
Every vegetable gardener knows that while the rewards are sweet, the vegetable gardening frustrations can be a bit bitter. -
Small Space Vegetable Gardening
Sep 23, 24 05:06 PM
Small Space Vegetable Gardening - Tips for growing vegetables in small spaces. -
Why Fall Gardening?
Aug 16, 24 12:24 PM
Fall Gardening: A guide to a Bountiful Harvest.
